


We have much more to do and your continued support is needed now more than ever.
Take a “LEAP!” How to Build an Urban Garden—No Experience Necessary
A Wildlife-Friendly DMV Garden Edition and Contest (see very bottom for details)
Wildlife-Friendly DMV connects wildlife enthusiasts in the District of Columbia, Maryland and Virginia to local wildlife and the National Wildlife Federation. I will share with you the wildlife and nature where I “roam,” and bring to life the stories of people around our region who speak up for wildlife.
…Till now.
I was told by Urban Organic Gardening expert Mike Lieberman that in gardening, “you don’t need a green thumb, just two opposable ones.” His words struck a chord with me, and they were the only encouragement I needed to face my fears and (attempt) to build an urban garden.
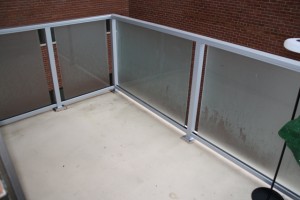
Step 1: Evaluate
The first step is evaluating– what kind of space do you have (either inside or outside) and what kind of sunlight does your space get (or will you use an indoor lamp)? I have a great outdoor balcony that gets 6-7 hours of morning sunlight.
Step 2: Plan
The second step is planning. What kind of plants and veggies do you want to grow? A smart question to ask yourself to answer this is, “What are the vegetables that you eat most often?” Based on this, I’m going to grow cherry tomatoes, jalapeños, mint and green peppers, and onions. I’m also going to grow flowers and a money tree (the tree is an indoor plant but can also be put outside in warm weather).
The other half of planning is deciding what tools you’ll need, and that requires a shopping list.
My items: seeds, soil, small shovel and planters.
Additional items for indoor planting: an indoor lamp

Step 3: Shop
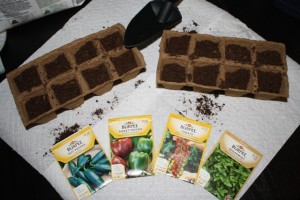
“Shop till you drop” as the saying goes, and with my shopping list in hand, I did just that at the local Home Depot. While shopping for my supplies, I learned that all the vegetables that I wanted to grow (except for the onions because I got bulbs), needed to germinate. Because of this, I also picked up biodegradable cowpots to germinate my seeds in.
Step 4: Plant
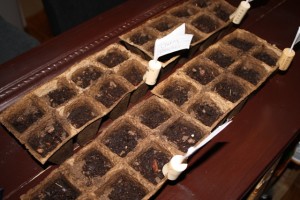
1) For the seeds that need to germinate: I set up my station of seeds, cowpots, soil and shovel. I then filled each cowpot with soil and then placed 2-3 seeds in each one (if more than one sprout comes up, that’s okay—you can transplant them into a new container). Water is the next step, and over the next 6-8 weeks, the mint, bell peppers, jalapenos and cherry tomatoes will germinate.
What the seeds need most: warmth and moisture. I have to make sure they are watered regularly, and remain warm (though that doesn’t mean they need lots of sunlight, as that can actually dry them out). I used plastic bags to make a greenhouse effect.
2) For the flowers that don’t need to germinate: I will plant those AFTER the fear of a late frost has passed; I bought California poppies and Dianthus to plant, along with onions.
Step 5: Wait
So on this Leap Day, I too challenge YOU to take a “leap” into the dirt, seeds and sunshine, by becoming an urban gardener—the environment (and your belly) will love you for it.
Think you have what it takes to become an urban gardener AND create a NWF Certified Wildlife Habitat? Take the challenge and email blevinsm@nwf.org with your story and pictures to be featured in an upcoming Wildlife-Friendly DMV post.
