


We have much more to do and your continued support is needed now more than ever.
Simple Holiday Crafts to Make With Your Kids
Instead of braving huge crowds and never-ending lines at the mall, head outside this holiday season! Take the kids to an outdoor area and have them “shop” for the supplies for three simple (and inexpensive!) nature crafts. You’ll get some fresh air AND you can check some people off your holiday gift list!
Note: You’ll need to pick up a few supplies at the craft store if you don’t have them at home.
Highlights:
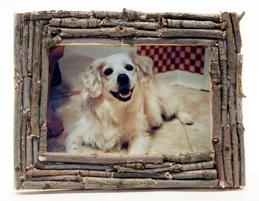
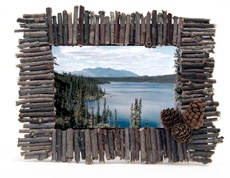
Twig Picture Frame
 What You Need:
- Picture frame
- Twigs
- Tacky glue
- Small pinecones, seeds, or acorns (optional)
What You Do:
1. Break the twigs into small pieces. (Grownups can use pruning shears if the twigs are too thick to break by hand.)
2. Apply glue to a section of the frame. Press some twigs onto the glue. Keep adding glue and twigs until you’ve covered the frame.
3. Once the glue has dried, you can decorate the frame with pine cones, seeds, or any other treasures you’ve collected on your walk.
 TIPS:
TIPS:
- If you don’t have much time or patience, you can use a hot-glue gun instead of Tacky glue. It’ll speed up the drying process. (But please be cautious if the kids are nearby because glue guns can get extremely hot.)
- Use twigs from different kinds of trees to give your frame interesting colors and textures.
- The straighter the twigs, the better. They will lie flat on the frame and will be easier to glue in place.
- Use this “natural” frame for a photo of your child enjoying the outdoors. Check out these tips to take great pictures of your kids outside.
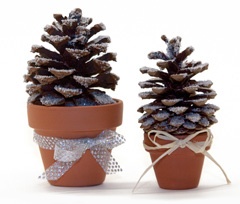
Snowy Pinecone Tree
 What You Need:
- Small flowerpot
- Pinecone
- Craft glue
- White glitter
- Ribbon or raffia
- Paintbrush
What You Do:
1. Brush glue over the pinecone and sprinkle with glitter.
2. Apply glue to the inside rim of the flowerpot. Place the pinecone inside the pot.
3. Tie a ribbon or raffia around the pot, then glue in place.
TIP: Turn this into an ornament by gluing a loop of ribbon to the top of the pinecone.
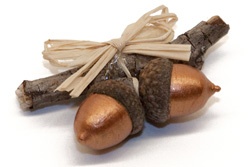
Acorn Pin
 What You Need:
- Acorns (the kind with a stem on the cap)
- Twig
- Acrylic paint
- Craft glue
- Raffia
- Pin back (available in craft stores)
What You Do:
1. Paint the acorns any color you like.
2. For each acorn, cut a piece of raffia about 6 inches long. Tie a knot around the stem on the cap. Then wrap and knot the raffia around the twig to attach the acorn. Repeat with the other acorns.
3. Snip off the excess raffia.
4. Glue a pin back to the back of the twig.
5. Glue a bow to the front of the twig (optional).
TIP: If you don’t have raffia, you can use thin ribbon or sturdy thread instead.
Photos by NWF/Nancy Ostertag
Michele Reyzer is an editor for Ranger Rick Magazine, and a busy mom to an outdoor-loving preschooler. Michele is an avid crafter, and especially enjoys creating nature crafts for kids.
