We have much more to do and your continued support is needed now more than ever.
3 Fun Backyard Activities For Kids
Guest post by Jennifer Bové.
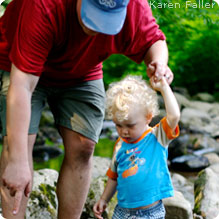 As a working mom, I’m always looking for easy ways to keep my three curious kids busy. And as a former field biologist, I know that watching, hearing, smelling, and touching the ever-changing natural world helps develop the skills kids need in every aspect of life.
That’s why I’m making it a priority to find bite-sized activities that families like yours and mine can squeeze into spare moments — without buying a bunch of toys or gadgets. With one of these simple “how-to” plans in hand, all we need to do is open the door. Let’s go!
HIGHLIGHTS:
Sort, Stack, and Shape
Make a Nature Bracelet
Create Your Own Compass
Sort, Stack, and Shape
Ages: Up to 3 years
What You Need:
- a backyard, park, or any safe outdoor place to explore
- twigs, grass, flowers, nuts, and other natural objects
What You Do:
Put aside the plastic toys aimed at teaching toddlers shapes and sorting skills. It’s a lot more exciting—and every bit as educational—to use items found outside. Nature offers all sorts of free teaching materials: sticks, stones, blades of grass, fallen leaves, and more.
- Use natural objects to introduce textures (bumpy, smooth, prickly, soft, etc).
- Sort a handful of stones by size.
- Break twigs into different lengths and help your child sort them – shortest to longest.
- See how high you can stack a pile of small rocks.
- Find a comfy spot to sit down and make shapes on the ground: twig triangles, rock rectangles, seed squares, and so on.
Make A Nature Bracelet
Ages: 3 to 7
What You Need:
- masking tape
- natural decorations: seeds, flowers, leaves, sand, grass, etc.
What You Do:
1. Tear a piece of tape to wrap around your child’s wrist, keeping it loose enough to slip on and off. (Make one for Mom, too!)
2. Wrap the tape into a bracelet with the sticky side facing out.
3. Slip the bracelet on, and go exploring outdoors. This is a perfect chance to slow down and enjoy the simple pleasure of hanging out with your little adventurer.
4. Wander and pick tiny treasures such as petals and seeds that you can stick onto the bracelet. Create cool patterns or decorate with wild abandon. The final product is not nearly as important as the experience of reaching out to touch nature (and even taking a little bit home for keeps).
5. Try making a new bracelet for each season and comparing the kinds of decorations you found during different times of the year.
Create Your Own Compass
A compass is an instrument for determining directions, using a rotating magnetized needle that indicates magnetic north (see the “dig deeper” link at bottom.) It’s easy to make your own!
Ages: 7 to 9
What You Need:
- magnet (I bet there’s one on the refrigerator)
- sewing needle
- paper or plastic plate that will hold water
- a leaf small enough to float freely in your plate
- masking tape and a marker
What You Do:
1. Lay the needle on a table, holding one end down with a finger.
2. Slide your magnet firmly along the length of the needle, moving from your finger to the end of the needle, and then lift the magnet. (Don’t rub the magnet back toward your finger.)
3. Repeat the magnet slide—always in the same direction—about 50 times. This will magnetize the needle.
4. You can test the needle’s magnetic pull with another piece of metal such as a paper clip. If they stick together, you’re ready to make a compass. If not, repeat the magnet rubbing several more times.
5. Make sure your dish is on a stable surface and fill it with water.
6. Place your leaf gently on the water so that it floats in the middle of the dish.
7. Carefully lay the magnetized needle on the leaf. This is your compass!
8. Without touching the compass, watch the needle. After a moment, it should begin to turn slowly all by itself. When it stops, it will point north and south.
10. You can use masking tape to label the four directions around your compass. To help kids learn the directions, say this silly phrase as you move clockwise around the compass: “Never Eat Slimy Worms!”
11. Now … Go outside and try this simple navigation exercise with your compass: Have your child stand next to a tree while holding the compass as level as possible (a book or cutting board underneath the plate can help keep it steady).
- Direct your child to walk 3 steps north, looking at the compass for reference.
- Now 6 steps east, making sure the length of child’s steps are fairly equal
- 2 steps south
- 3 steps east
- etc, etc
12. Your child should end up back at the tree where the trek began! You can create more complex “treks,” winding around all sorts of obstacles in your yard or neighborhood park. You could even create a treasure map and leave a surprise for your child where “x” marks the spot!
Dig deeper into the concept of compass navigation here: http://www.abc-of-hiking.com/navigation-skills/compass-navigation.asp
Jennifer Bové, mom and former field biologist, is an award-winning contributor to NWF and the editor of three anthologies including Wild With Child: Adventures of Families in the Great Outdoors. Jennifer’s blog is filled with timely tips and family fun. Stop by for a visit atwww.bovesboots.blogspot.com.

